

How cool is that. I find the more I get into the online community within the woodworking field it seems the smaller the world gets. Thanks Marc for the credit.
if you want to see this Podcast go here to download: Right Click to Download
or go to the site and watch it there.
www.thewoodwhisperer.com
BTW this podcast is a hilarious throwback to the old safety videos from school. I would recommend following this podcast as it is very informative and extremely entertaining.
as far as the shop goes:
being safety week I am working on a crosscut sled for my tablesaw and if I get time this week I will try to rig up a homemade air filter in the shop.
till next time keep working' wood and be safe!
Tuesday, May 3, 2011
Monday, April 25, 2011
Shop upgrade
So I am in the process of reworking my shop. I have plans to make cabinets to cover most of the wall space it will provide more work area and storage for all my tools and such. Already finished the first stage of the makeover and already plans have changed from the original design.

 So here is what the first phase covered: I had to level some of my basement floor so I could put my roll around tool cabinet by the door. (this is taking some getting used to as the tool chest moved from the other side of the shop) The floor was off enough that I levelled it using 2x4's on their sides and tapered down to anywhere from 1/2 to 7/8 of an inch on the one end(the floor is out this much and out of 5 boards not a one is cut like any other)

 I only put 2 anchors into the floor to secure the platform. I wasn't worried about the base moving from side to side but I didn't want it to slide away from the wall. The weight of the shelving and tool chest will hold it in place otherwise.


So here was the finished planned stage 1. I was troubled by the wasted space next to the shelf between it and the wall. So I decided to add some shelves to store another drawer cabinet and my woodworking magazines. This is the final outcome.
 After doing this first stage I figured it's about time to sharpen my chisels. I always let this aspect of my woodworking lag but I need to do something other than go and buy a new chisel when I have a new project lol. That gets expensive. here is a quick look at my work that is ahead.....


So here was the finished planned stage 1. I was troubled by the wasted space next to the shelf between it and the wall. So I decided to add some shelves to store another drawer cabinet and my woodworking magazines. This is the final outcome.


Friday, April 1, 2011
Niddy Noddy
So I made a Niddy Noddy based on the Oseberg design. the original looks like this:
 Now I have made Niddy Noddys before for commission that were plain jane like this:


Just made one based on the dimensions of the above but styled more like the top photo for a commission and it looks like this:

This is on it's way to France. For those not of the fiber arts persuasion this little tool is used to wind yarn after it is spun to put it into skeins.
Overall dimensions are 13" wide X 17" long X 3/4" thick the centre arm is mortice and tenoned into the arms.
Saturday, March 12, 2011
Sorry folks been out of touch....
And by that I mean touching my wood, and seriously I mean that in a non dirty sort of way lol.
 I had the chance to help a dear friend out and "helping" (and by that I mean I built it for her, what can I say I'm a sucker for a cute smile) Build a writing slope, sometimes called a portable scribe's desk. She asked for a box with a sloped lid. I had to Bear-ify it though.
 She wanted a quick and dirty "just nail it together" type writing slope.
 So I did but I tweaked a couple items for her.
 The bottom is dadoed into the four sides.
 I added a divider with a stop-dado
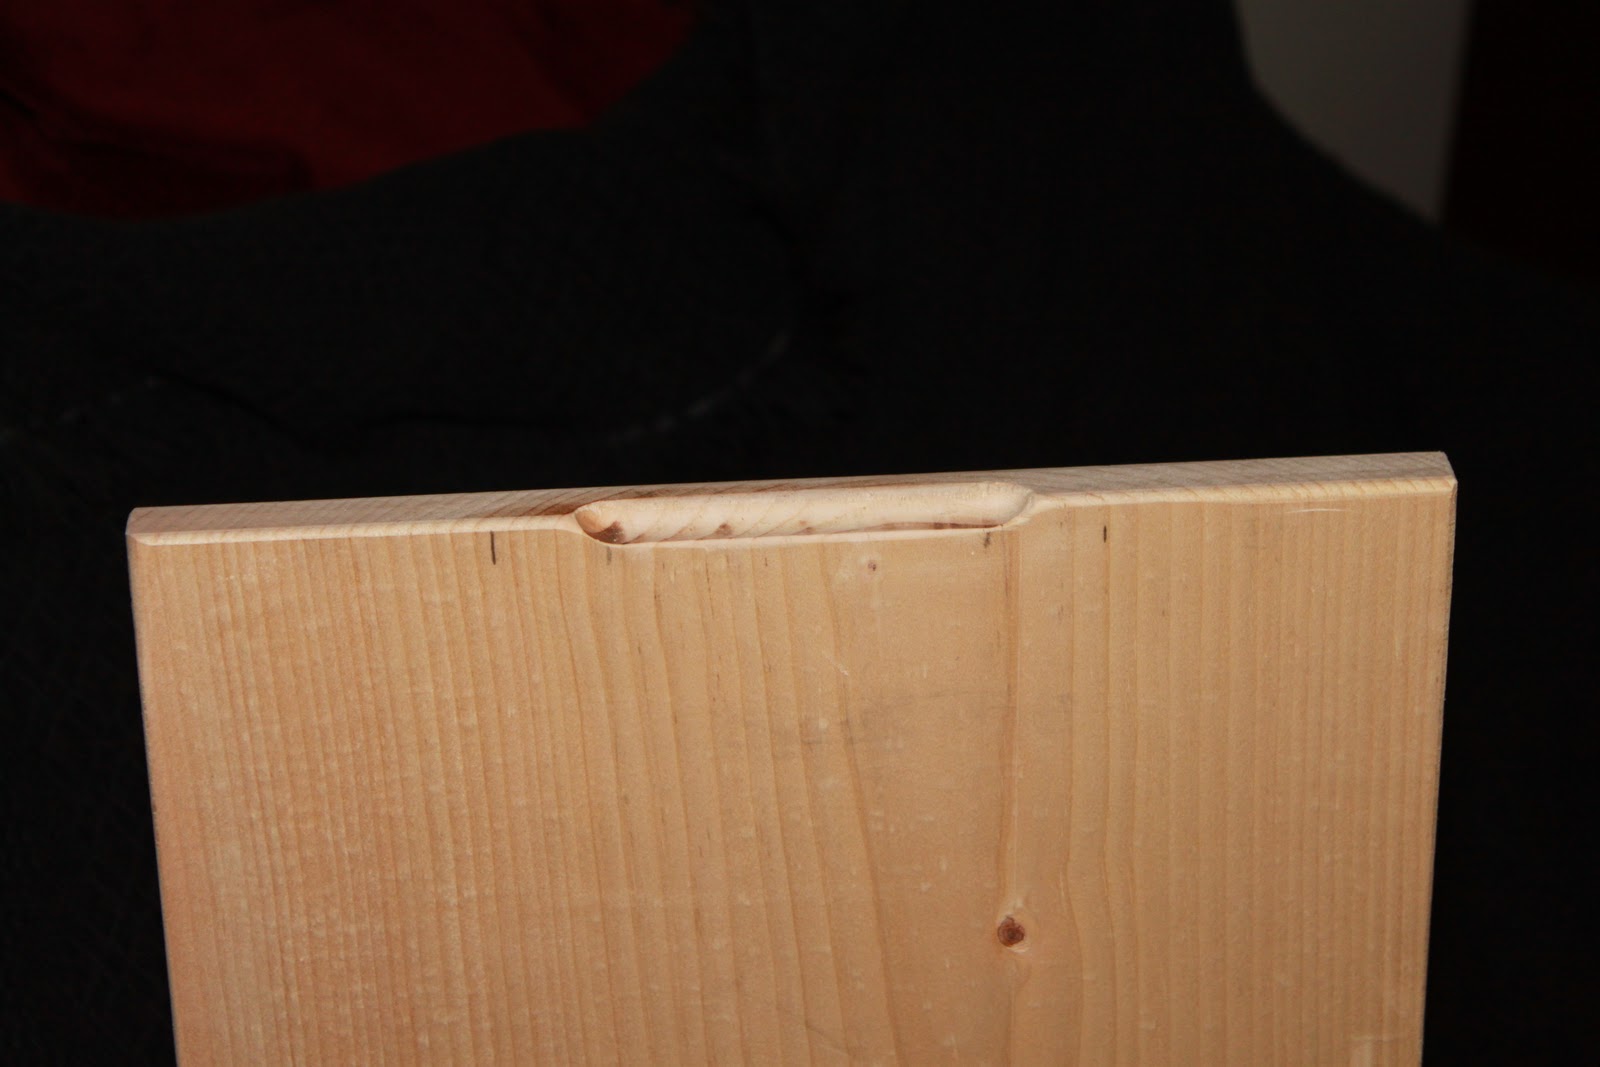
 A finger groove for easy opening.
 A couple of hinges to tie it all together. For those woodworkers out there yes those are brad nail holes I filled with wood filler. but at least I glued up the corners.
Hope to have other projects on the go soon and since I am getting some money from my tax return I am planning on overhauling my shop.
Stay tuned for the updates.......


Hope to have other projects on the go soon and since I am getting some money from my tax return I am planning on overhauling my shop.
Stay tuned for the updates.......
Wednesday, December 29, 2010
I have been doing stuff I promise
I have been doing some woodworking. I have been teaching some people some basic stuff about woodworking, how to construct a loom and even teaching my daughters how to do sawing with a hand saw.
The reason I have waited so long to post is because the big project I was working on was a christmas gift and I wanted to make sure the recipient didn't know his present was on it's way. I made a chess set! yup a real chess set but not only a chess set but what I am told is a royal chess set.
 now the difference is that the board is 10x10 instead of 8x8. the back row has 2 extra pieces in it, the Champion and the Cardinal.
here are the individual pieces:
The Queen

The King

The Knight


The Pawns

The Champion (this was supposed to look like a dragon but turned out more like a chicken)


and a look at the set from the other side.

I had a chance to play a game with the extra pieces and it was pretty fun. I just can't bring myself to look at my lathe for a while now lol.
The reason I have waited so long to post is because the big project I was working on was a christmas gift and I wanted to make sure the recipient didn't know his present was on it's way. I made a chess set! yup a real chess set but not only a chess set but what I am told is a royal chess set.

here are the individual pieces:
The Queen

The King

The Knight

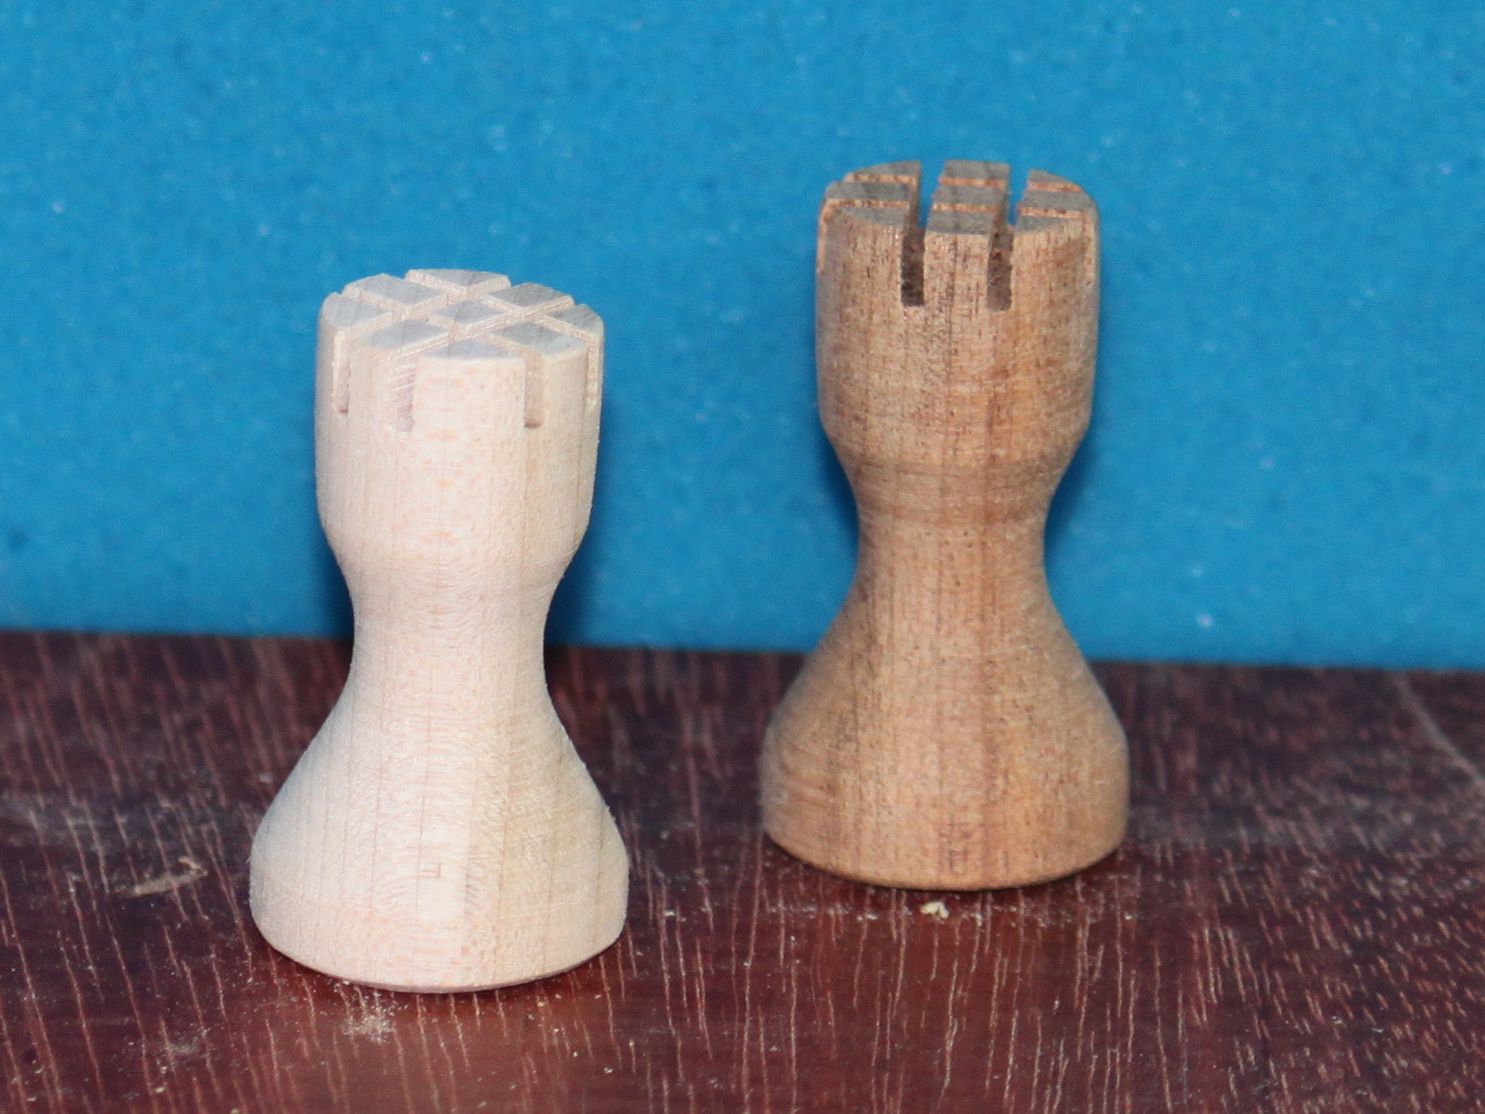
The Bishop

The Rook
The Pawns


The Cardinal

and a look at the set from the other side.

I had a chance to play a game with the extra pieces and it was pretty fun. I just can't bring myself to look at my lathe for a while now lol.
Thursday, December 2, 2010
Another Giveaway
Well rob is offering another cool giveaway over at the Concorde Carpenter
Go here to check it out.
 Thanks again Rob for the opportunity to win cool stuff!
Go here to check it out.
Thursday, November 25, 2010
so to sum up...
Ok to make a short story shorter, I thought I had been more active in woodworking. I guess I failed in that I only had one more project that I did to catch me up.
I made some looms for some nice ladies up north. From all accounts I have heard they are enjoying them even with some little flaws that came through the final product. I bought a planer to dimension the lumber needed to make the looms. I have to say I am pleased with the planer ( Dewalt DW735) right out of the box it worked great with no snipe or anything noticeable as far as finish goes. Here is what I made with it:
 Thats a pretty good sized pile o' wood shavings lol. This pile was about a foot tall 2 feet wide and about 4-5 feet long. But geez it was fun hehehe. So after making all this I made the looms:

 The last picture is of a couple of shuttles I included with the looms. Happy weaving ladies.....
I made some looms for some nice ladies up north. From all accounts I have heard they are enjoying them even with some little flaws that came through the final product. I bought a planer to dimension the lumber needed to make the looms. I have to say I am pleased with the planer ( Dewalt DW735) right out of the box it worked great with no snipe or anything noticeable as far as finish goes. Here is what I made with it:


Subscribe to:
Posts (Atom)
